Kaffe Fassett Mystery Afghan KAL – Clue 1 with pattern chart

*NEW* now with ALL colourways!

Week One Square revealed

Clue One Square revealed

As promised, here’s a little update on the progess of the Rowan Yarns & Kaffe Fassett KAL (for pattern and links check my previous post). I have finished knitting 5 of my clue one squares and am enjoying it so far.The pattern is easy enough to knit and remember, and I like the colours of the first square. Rowan are offering two versions of the square, one using M1 to increase, and one using Inc. It really is up to you which version you make, but I prefer the M1 as it makes for a neater square (Rowan Tip sheet here). The one thing I found a litte tedious though was following the written instructions – I promptly misread the instructions for my very first square, slightly mixing up the colour sequence – oops. I actually really like my little blunder though and have decided to stick with it for the rest of the KAL. Let’s hope it’ll work out when the Afghan is assembled.

To help speed up your knitting, here’s a little chart I made with colour coded lines. The original version is by my friend Sarah who is making the brown colourway and has kindly allowed me to use and edit it as my own version. Simply click on the image to open the .pdf, then click save or print. Please note: This chart is for the original Kaffe version. If you’d like to change to the IamSnowfox stripe version rows 29-30 need to be knitted with colour C. 

Kaffe_Fassett_Kal_clue_1_chart

Turquoise

Kaffe_Fassett_Clue_1_pastel

Pastel

Kaffe_fassett_clue_1_red

Red


To get Sarah’s
chart for the brown colourway, check out her post on Nottingham Knitter.

I find with the coloured lines it is SO much faster to knit – all you need to check on the chart is whether you’re on a decrease, increase or simple knit/purl row. I do recommend you knit the square from the original instructions at least once so you know where to place the incs and decs. Let me know if you find this helpful and I will continue to post the charts for each upcoming week of the KAL. Happy knitting!

DIY Recycled Cardboard Jewellery Display Tutorial

Cardboard_Jewellery_Display

I don’t know about you, but it’s already March and some of my NYE resolutions haven’t really taken off. Like reducing my yarn stash. Or fitting back into my old jeans. Or decluttering.
Decluttering! It’s amazing how much stuff we collect over the years. I’ve been feeling quite heavy (not literally.. ok maybe a little bit) with things in the last few months.
I was originally planning to get rid of at least one possession every day of the year. That makes 365 things in a year. Sounds great, doesn’t it?

But as things go, I commute between two countries, I have two households, I have a lot of stuff, but not necessarily all in one place. So the decluttering doesn’t always happen when and where I’d like it to happen.
I’m  spending 2 consecutive weeks in the same house this month, so last week saw me frantically rooting through my wardrobes, drawers, boxes, tins – you name it, I’ve probably got something stored in it.

I don’t like throwing perfectly good clothes (jewellery, household items) away, I’d rather swap or resell them, or give them to charity. Time for a trip to the flea market! 

Previous trips to markets and car boot sales have taught me that chaos is not good. Jumble is not good. Nobody will be interested in your things if your stall is one big mess. So this year, I’m being super organised. I’m taking tables to display all the little items, clothes racks for all the stuff I don’t wear anymore.. but what to do with the jewellery?
I could buy a jewellery display. But wait, the whole idea was to get rid of things, not buy more things! So I came up with a quick and simple solution: A cardboard display that can be discarded (you can of course keep it and reuse it later).
I had all the materials at home so it cost me literally nothing apart from a little time. So here’s my tutorial for a super easy, cost effective and environment friendly portable jewellery display.

You will need:

Strong cardboard (an old box does the job)
Scissors
A very sharp knife
Large darning needle
Surface you can cut on

Cardboard_Jewellery_Display_materials

Start by deciding what items you want to display, and how big you’d like your display to be. Cut your cardboard to the desired size using the scissors (I used the knife, but scissors are a bit neater. The knife will leave your edges slighty rough). Next, decide what you want to hang where. Earrings take up the least space, short necklaces can be displayed beneath each other, long ones lined up next to each other.

Cardboard_Jewellery_Display_earrings

To hang your earrings, simply punch a hole for each earring through the cardboard with your darning needle. Make sure to leave some space between the holes so your dangly earrings don’t get tangled.

Cardboard_Jewellery_Display_earrings_tutorial

For shorter necklaces, use your knife to diagonally make one cut into each side of your cardboard like shown in the photo below.

Cardboard_Jewellery_Display_necklace_short_tutorial

For really long or bulky necklaces, cut out an upside down ‘U’.

Cardboard_Jewellery_Display_necklace_long_tutorial_diy

Punch the ‘U’ from the back of the cardboard so it stands out a little bit. Use the ‘U’ like a hook to hang up your necklace. This method also works well for bracelets.

Cardboard_Jewellery_Display_necklace_long_tutorial

Before you hang up all your things, you could also use pens, markers or paint to draw on your cardboard. Once you’re satisfied with how your display looks, decide how you want to hang it. I used metal scarf hangers as their grip is quite firm and they will hold a lot of weight. I can simply hang them onto the ends of the clothes racks and people will be able to see all the pretty things without having to dig through a box of tangled chains. You could of course also just lean them against something, or tie some string through two holes at the top and hang them on a wall. Or use a skirt hanger and hang inside your wardrobe for neat jewellery storage.

Cardboard jewelry display

Anthropologie Inspired Gift Tag Tutorial

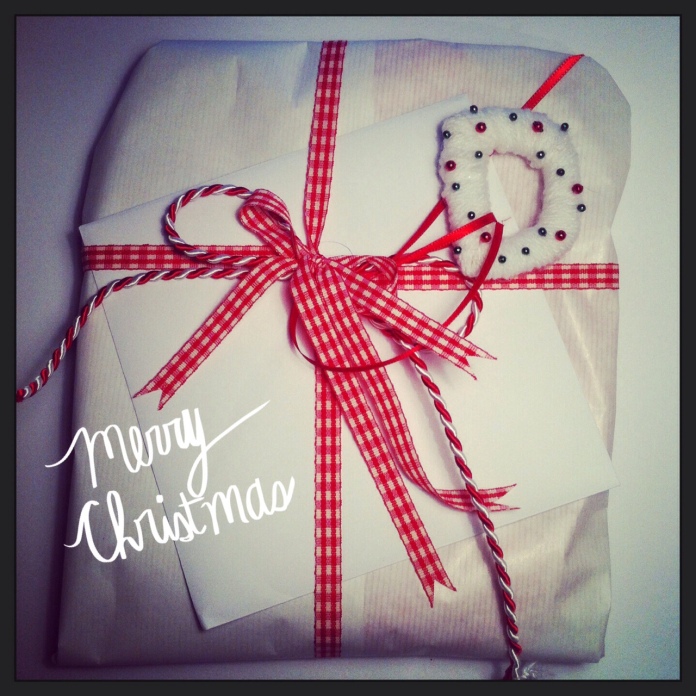
I recently saw Anthropologie’s cute Pop Dot Monogram Decorations, and immediately decided that yarn letters would be perfect as gift tags for my Christmas presents this year. Almost all of my presents are handmade, so of course the tags would have to be handmade too. I have lots of odd bits of wool and glittery things lying around, and these letters are perfect to use those last scraps up.

Anthropologie Gift Tags FinishedThese letter tags are quick to make, the materials cost next to nothing and they look cute both as gift tags and as decorations on your Christmas tree! I made a whole set of MERRY CHRISTMAS letters which I’m giving away as a gift this year. And of course you could change the theme to go with any occasion, birthdays, holidays.. you name it!

Here’s what you need:

Anthropologie Gift Tags Utensils1. Glue Stick (I like Pritt)
2. Hot Glue Gun (keep out of reach of children!)
3. Decorations (I used card making supplies, but anything goes. Sequins, beads, etc)
4. Scrap Yarn
5. Pencil
6. Cardboard
7. Scissors

First, decide how big you want your letters to be. You can either draw them freely, or print templates and glue them to your cardboard. I made my letters about 7cms tall. Cut all letters out neatly trying not to bend the cardboard too much.
Anthropologie Gift Tags RawChoose your yarn colours. Start by glueing the end of your strand of yarn to the cardboard with the hot glue gun and let it dry. Wrap a thin layer of yarn around the whole letter. If you have trouble keeping the yarn in place, use a little bit of hot glue to fix single strands. Don’t worry about the glue peeking through, you can hide the glue under the next layer of yarn. I used hot glue for sharp angles and to stop the yarn from sliding off the edges of my letters. Tiny amounts of glue will do so don’t go overboard. You can even out any wonky lines in your letter by simply wrapping more or less yarn around the cardboard.Anthropologie Gift Tags HalfwayLetters with holes (A’s, D’s, etc) can be tricky to wrap if they are too small. It helps winding your wool into a tiny ball that will fit through the holes, or cut a long piece of string, thread it through a sewer’s needle and use that to wrap your letter. 
Anthropologie Gift Tags PureWhen you have finished wrapping your letters, pick up your glue gun and your decorations and get creative! 

Merry Christmas!
Anthropologie Gift Tags Present